Installing Your Skinner Sights
Let's get those sights installed.
This blog covers it all in detail. We also have a video on our YouTube channel. I recommend reading/watching both.
"Skinnerizing Miss Kitty" on YouTube

Installing your first set of sight can be a bit daunting at first but, no worries, its pretty easy, straight forward, and you can do it. After working with thousands of customers over the years, we have experienced 99% success. We believe in you!
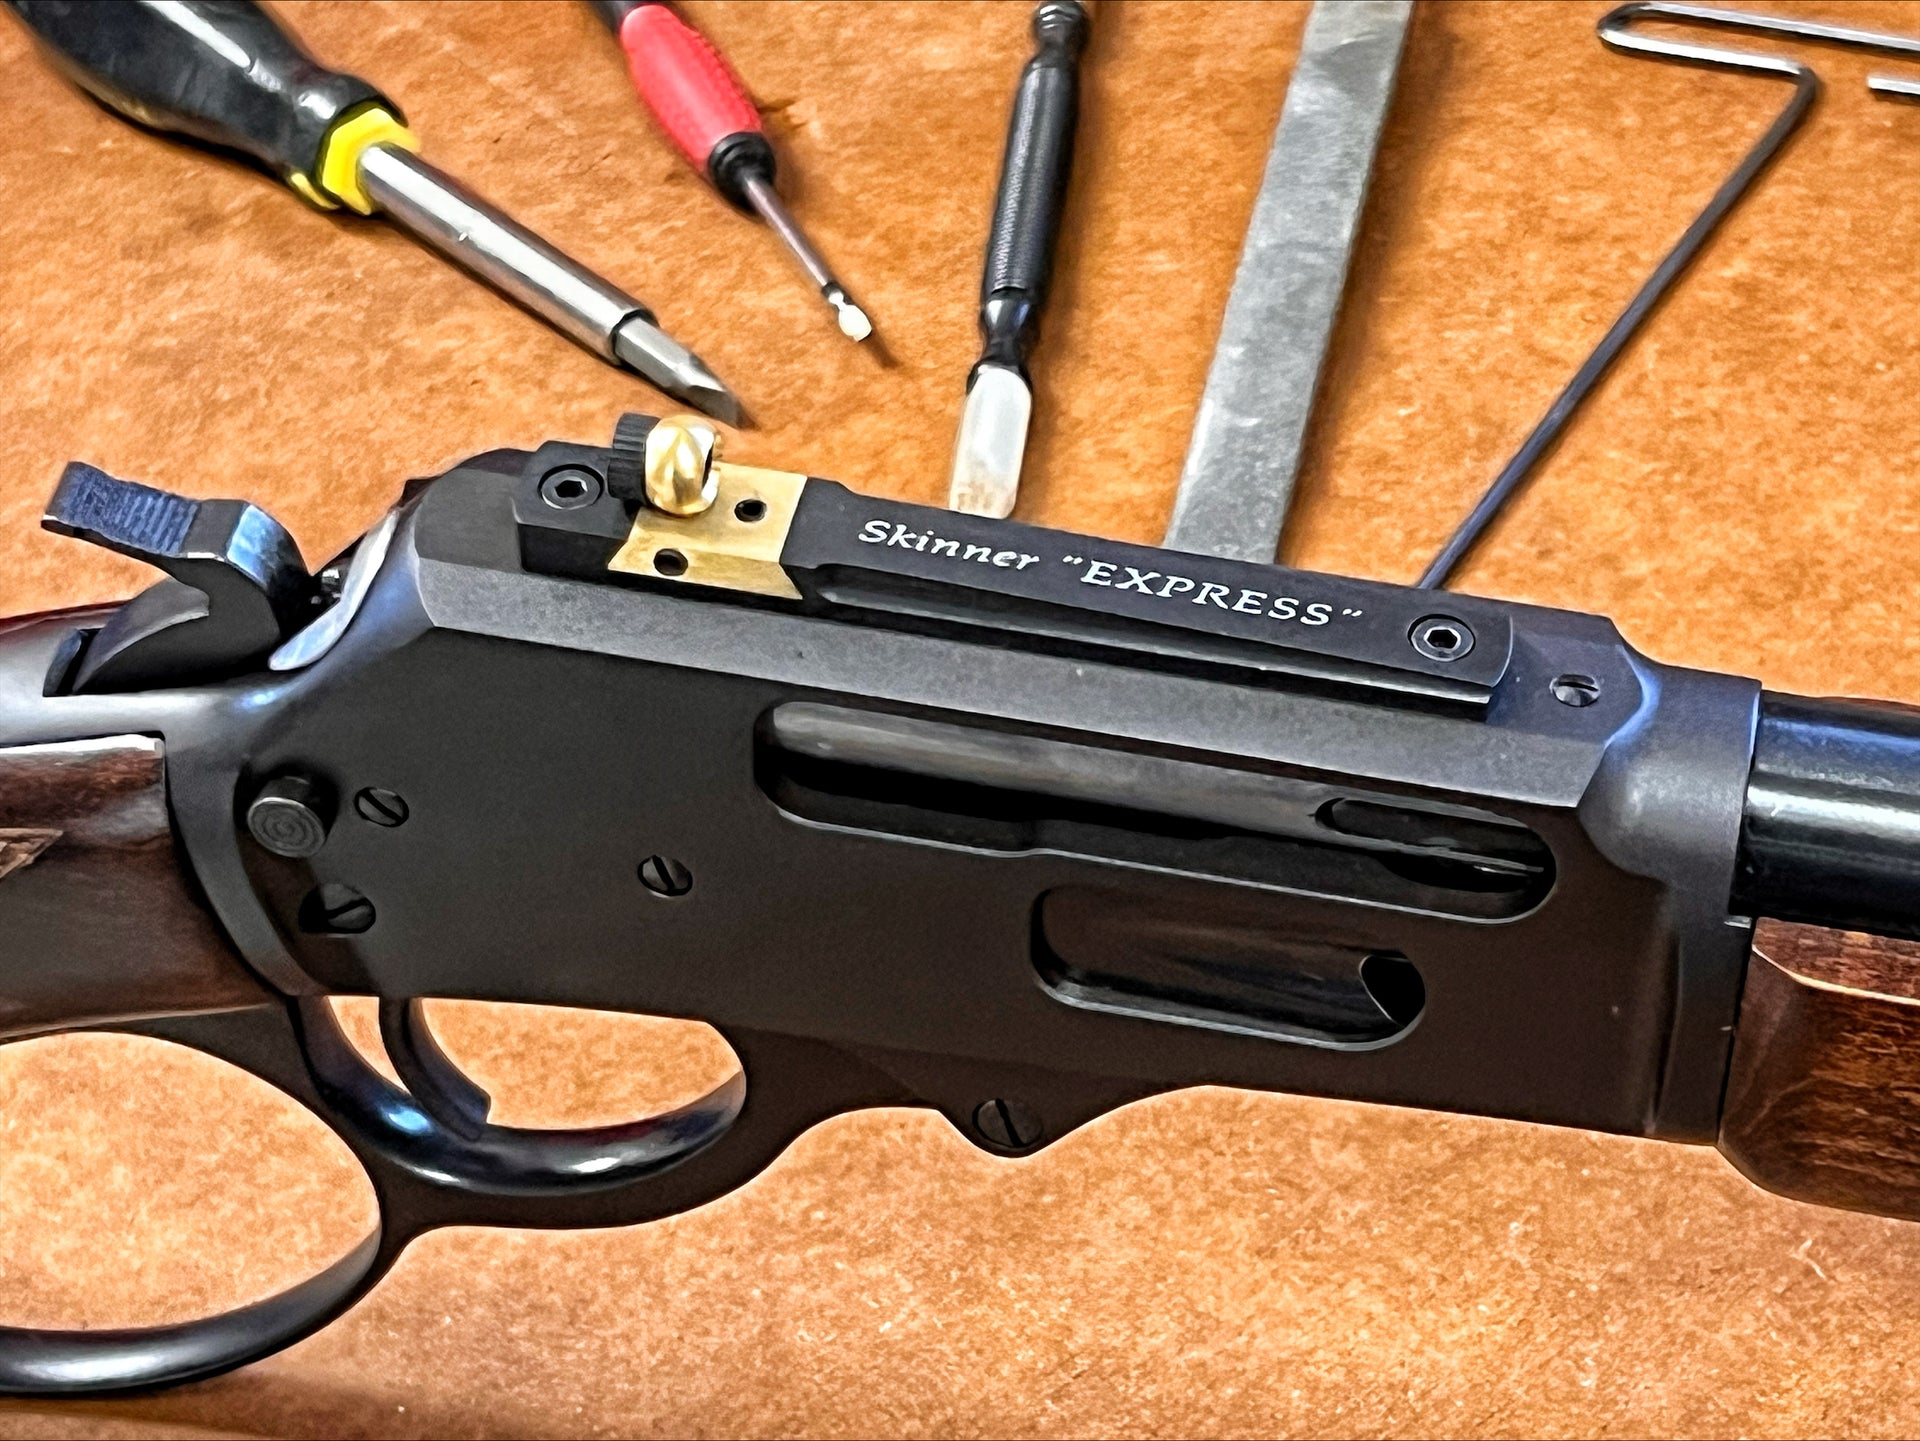
Shown above is a typical set up for a standard lever action rifle. This will be similar for any action type, Lever, Bolt, Semi Auto, Pump, etc. There are three basic components used here.
1. Rear Sight
2. Front Sight
3. Dovetail Slot Blank.
Lets get them on the gun!
First, make sure the chamber and feeding path are empty. Unload the gun, always point it in a safe direction. Hold the barrel firmly in a padded vise or the rifle in a firearm cradle while working.
Now we remove the factory rear sight:
This is a Rossi R95 45-70 16" carbine with a "Buckhorn" rear sight and a ramp mounted bead front sight.

For now, we will remove the rear sight and leave the front sight in place. The rear sight is mounted in a "dovetail" slot on the barrel. "Dovetail" means instead of a square slot; the edges are angled to hold the rear sight in place.
Remove the "elevator" (Notched adjustment piece in the sight) and slip a piece of paper between the sight and the barrel to protect the barrel from scratches as the sight slides over it.

Using a nylon, brass, {or even a wooden dowel might suffice), tap the sight OUT FROM THE LEFT SIDE GOING TOWARDS THE RIGHT SIDE as viewed looking down the barrel. Take it out and set it aside. I used the Wyoming Sight Drifter we offer HERE. This is one of the best tools you will ever purchase. A brass punch (Available HERE) and a small hammer can also be used. Do NOT use a steel punch.
Now install the DOVETAIL SLOT BLANK:
The blank is installed with the punch mark on the BOTTOM of the sight. THE MARKINGS ARE ON THE BOTTOM OF THE DOVETAIL BLANK. If you try to put the blank in upside down it will not match the dovetail slot sides and will fall out.

Try the blank in the dovetail from the RIGHT side. The goal is for it to start into the slot and maybe push up to 1/3 of the way in with FIRM thumb pressure. NO POUNDING... From here forward, if you are pounding, you are doing it wrong. Gentle tapping only. If its too tight, fit it slightly more. Rember, "a little is a lot" when fitting a sight. Again, the Wyoming Sight Drifter is perfect for this work.
If the blank does not push into the slot part way, FILE OFF THE BOTTOM FLAT OF THE BLANK evenly till it will start to push in. Use a sharp flat file, DO NOT file on the rifle slot.

Tap gently to the center.
In the case of this Rossi R95 there was a 6-48 hole under the rear sight, plug this hole with a filler screw. Available Here
Remove The Receiver Sight Mount Hole Plug Screws:

Remove the screws that line up with the holes in the new Skinner Sight and any that are between them. We do not want any plug screws under the sight body.
Set the new sight in place and thread both mounting screws in part way. Then tighten one fully, then the other. Front or back first, doesn't matter...
Do NOT put Loctite on these screws. The sight is light and low, it will not be affected by recoil to the same degree as a scope. No torque wrench needed. Use the supplied Allen wrench, using the long arm of the wrench, tighten until the wrench just starts to flex (Bend) This is essentially a torsion type torque wrench and works very well.

YOU ARE NOW READY TO TEST FIRE THE RIFLE:
Using "Best" and "Safest" practices, take the rifle to the range and fire three shots at 25 yards on paper, using the factory front sight. We do this to establish the EXACT HEIGHT of a replacement front sight IF needed. Many firearms regulate perfectly with the new rear sight and the factory front sight, others need a change in front sight height. No worries. Either use this Sight Calculator link to determine the amount of change needed or give us a call at 406-745-4570 Mon - Fri Montana time and we will determine which front sight would be best for you.
IF a front sight change is needed....
Changing Out The Front Sight:
This is a relatively easy process. After removing the rear sight and installing the dovetail blank, you are already a pro...
There are Three main types of front sights. 1. Dovetailed directly into the barrel 2. A screw mounted ramp with a dovetail slot for the sight 3. Direct mounted screw on one piece sights (Like our BEAR BUSTER)

In this case we have a screw mounted ramp with a dovetailed front sight . This is the factory set up. We could have used the factory ramp and only changed the sight insert but I like a bit sleeker ramp set up. Ours is mounted with a single screw and yes, it is enough to hold it securely. First we remove the factory ramp screws.

And install the new ramp. (Again, you can use the factory ramp also)
The single screw will go into the front hole on the barrel, the rear hole will be covered by the ramp. The single screw will be sufficient to hold in place. If the screw bottoms out in the hole before the ramp is tight, file a little bit off the tip of the screw. Go slowly and check as you go.

Now FIT THE FRONT SIGHT TO THE RAMP DOVETAIL. Do NOT Pound into place without fitting. Even though the single screw is sufficient, the forces exerted when pounding are too much. Gentle tapping is the goal, so let's fit the front sight to the ramp.
First, check the sight from the RIGHT SIDE and see if it starts into the ramp, if so, gently tap to center. If not, we first lightly "blunt" the sharp edges of the sight dovetail and try it again.

If it will still not start into the dovetail and press in 1/4 of the way across with firm thumb pressure, we take some off the BOTTOM of the sight. Using a sharp file and using the marking on the sight (or machine marks) to gauge level, file flat across the bottom till it will begin to press in. Remember, go slow, a little is a lot.

Use those marks to gauge level filing...

Take smooth even strokes checking your progress as you go. Keep checking till the sight just starts to press in to the dovetail about 1/4 of the way. Some sights will be slightly tapered on the left side, we need to fit till the actual width of the sight dovetail starts to fit.

Then GENTLY TAP to the center.
Remember, if windage adjustments are needed, they can be split between the front and rear sight adjustments. If the rear sight is without windage adjustment (rare) use the front sight for windage.
YOU ARE DONE !!!!!
Sit back and admire your work. The sense of accomplishment and the satisfaction of SUCCESS will be your reward.

Hope that helps!
Andy